> ## Documentation Index
> Fetch the complete documentation index at: https://docs.heffl.com/llms.txt
> Use this file to discover all available pages before exploring further.
# Setting up the client portal
The client portal is a secure space where your clients can log in to see their quotes, invoices, jobs, and projects, make payments, and submit requests, without contacting your team. Access is set per company and used by the contacts linked to it. This guide covers enabling the portal, what clients see, file access, and payments.
 ***
## How the client portal works
When you enable the portal for a client, the contacts linked to that company can log into a branded portal using their email. Because access is tied to the **parent company**, all contacts under that company share the same portal, and each needs a valid email on record to log in.
***
## Enabling the portal for a client
1. Open the company record from **Clients** or **Companies**
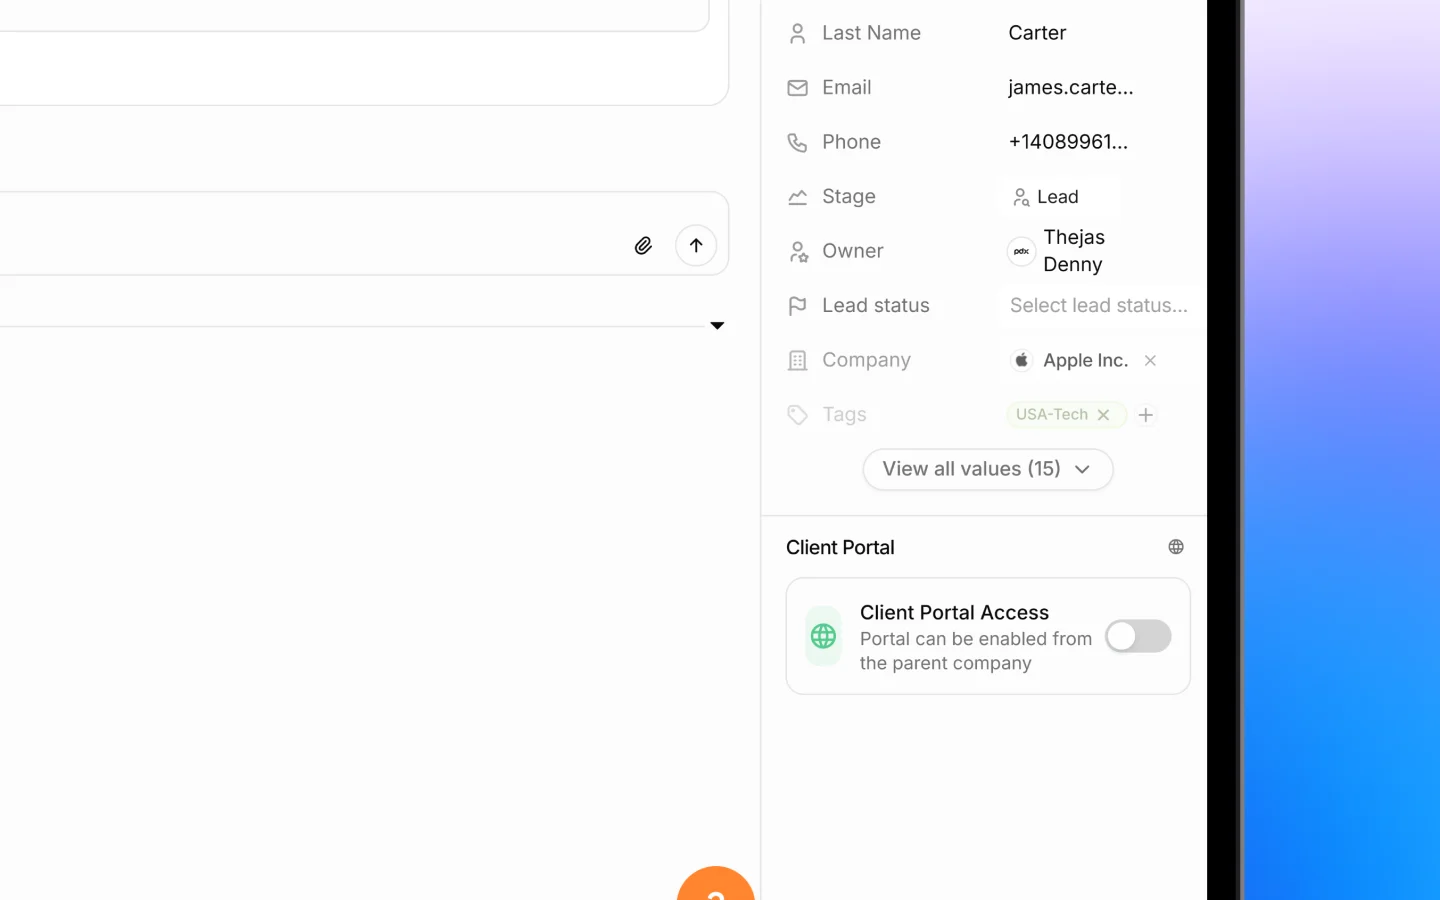
2. In the **Client Portal** section on the right, find **Client Portal Access**
3. Toggle it on
Once enabled, the record shows a **Client Portal Enabled** badge, and a portal link (a [portal.raveo.co](http://portal.raveo.co) address) is generated. Copy it with the copy icon to share with your client. For a contact whose access is controlled by its company, enable the portal from the parent company.
***
## How clients log in
Clients log in without a password, using a one-time code:
1. The client opens the portal link
2. They enter their email (the one on their contact record)
3. A 6-digit code is sent to that email
4. They enter it and click **Verify code**
Make sure each contact who needs access has a valid email. See [Adding and managing contacts](https://docs.heffl.com/adding-and-managing-contacts).
***
## What clients see
The portal home greets the client by name and shows:
* **Take Actions**, highlighting urgent items such as overdue invoices, with a **Pay Now** option
* **Pending Invoices**, with amounts, due dates, and status
* **Pending Quotes** to review
* **Active Jobs** in progress
* An **About Us** block with your company information
* A **New request** button to contact your team
The portal sidebar gives access to these sections:
* **Requests**, **Quotes**, **Invoices**, and **Tasks**
* **Projects** and **Jobs**
* **Files** and **Products/Services**
* **About Us** and **Contact**
***
## What clients can do
Through the portal, clients can:
* **View and pay invoices** online
* **View quotes** (quotes are view-only in the portal; acceptance is handled with you directly)
* **Track jobs and projects** in progress
* **View and download files** attached to their records
* **Submit a new request** to your team
This lets clients self-serve the information and payments they need, reducing back-and-forth.
***
## Managing file access
Clients do not browse a general file library. They see only the **files attached to their own jobs and invoices**. To control what a client can access, manage the files attached to their records, anything attached to their job or invoice becomes visible to them in the portal's Files section.
Portal files are **view and download only**; clients cannot upload files through the portal.
***
## Enabling online payments
For clients to pay invoices in the portal, connect a payment provider:
1. Connect **Stripe** or **Telr** under Apps & integrations. See [Integrations and connected apps](https://docs.heffl.com/integrations-and-connected-apps).
2. Once connected, a **Pay Now** option appears on the client's outstanding invoices in the portal
Payments made this way can be recorded against the invoice. See [Payments: recording and collecting](https://docs.heffl.com/payments-recording-and-collecting).
***
## Managing access
* **Enable or disable** the portal any time with the Client Portal Access toggle
* **Add a contact's email** so that person can log in
* **Reshare the link** by copying it from the company record
Disabling the toggle removes access for that company and its contacts without deleting any data.
***
## What to do next
1. [Add contacts with valid emails](https://docs.heffl.com/adding-and-managing-contacts) so clients can log in
2. [Send quotes and invoices](https://docs.heffl.com/creating-and-sending-quotations) for clients to view and pay
3. Connect [Stripe or Telr](https://docs.heffl.com/integrations-and-connected-apps) to enable online payments
***
## How the client portal works
When you enable the portal for a client, the contacts linked to that company can log into a branded portal using their email. Because access is tied to the **parent company**, all contacts under that company share the same portal, and each needs a valid email on record to log in.
***
## Enabling the portal for a client
1. Open the company record from **Clients** or **Companies**
2. In the **Client Portal** section on the right, find **Client Portal Access**
3. Toggle it on
Once enabled, the record shows a **Client Portal Enabled** badge, and a portal link (a [portal.raveo.co](http://portal.raveo.co) address) is generated. Copy it with the copy icon to share with your client. For a contact whose access is controlled by its company, enable the portal from the parent company.
***
## How clients log in
Clients log in without a password, using a one-time code:
1. The client opens the portal link
2. They enter their email (the one on their contact record)
3. A 6-digit code is sent to that email
4. They enter it and click **Verify code**
Make sure each contact who needs access has a valid email. See [Adding and managing contacts](https://docs.heffl.com/adding-and-managing-contacts).
***
## What clients see
The portal home greets the client by name and shows:
* **Take Actions**, highlighting urgent items such as overdue invoices, with a **Pay Now** option
* **Pending Invoices**, with amounts, due dates, and status
* **Pending Quotes** to review
* **Active Jobs** in progress
* An **About Us** block with your company information
* A **New request** button to contact your team
The portal sidebar gives access to these sections:
* **Requests**, **Quotes**, **Invoices**, and **Tasks**
* **Projects** and **Jobs**
* **Files** and **Products/Services**
* **About Us** and **Contact**
***
## What clients can do
Through the portal, clients can:
* **View and pay invoices** online
* **View quotes** (quotes are view-only in the portal; acceptance is handled with you directly)
* **Track jobs and projects** in progress
* **View and download files** attached to their records
* **Submit a new request** to your team
This lets clients self-serve the information and payments they need, reducing back-and-forth.
***
## Managing file access
Clients do not browse a general file library. They see only the **files attached to their own jobs and invoices**. To control what a client can access, manage the files attached to their records, anything attached to their job or invoice becomes visible to them in the portal's Files section.
Portal files are **view and download only**; clients cannot upload files through the portal.
***
## Enabling online payments
For clients to pay invoices in the portal, connect a payment provider:
1. Connect **Stripe** or **Telr** under Apps & integrations. See [Integrations and connected apps](https://docs.heffl.com/integrations-and-connected-apps).
2. Once connected, a **Pay Now** option appears on the client's outstanding invoices in the portal
Payments made this way can be recorded against the invoice. See [Payments: recording and collecting](https://docs.heffl.com/payments-recording-and-collecting).
***
## Managing access
* **Enable or disable** the portal any time with the Client Portal Access toggle
* **Add a contact's email** so that person can log in
* **Reshare the link** by copying it from the company record
Disabling the toggle removes access for that company and its contacts without deleting any data.
***
## What to do next
1. [Add contacts with valid emails](https://docs.heffl.com/adding-and-managing-contacts) so clients can log in
2. [Send quotes and invoices](https://docs.heffl.com/creating-and-sending-quotations) for clients to view and pay
3. Connect [Stripe or Telr](https://docs.heffl.com/integrations-and-connected-apps) to enable online payments