> ## Documentation Index
> Fetch the complete documentation index at: https://docs.heffl.com/llms.txt
> Use this file to discover all available pages before exploring further.
# Setting up your workspace
This guide walks you through configuring your Heffl workspace after signing up for the first time. Complete these steps before inviting your team.
***
## 1. Company details
Go to **Settings > Company** and fill in the following:
* Company name
* Logo (used on quotes, invoices, and the client portal)
* Address
* Phone number
* Website
* Default currency
* Timezone
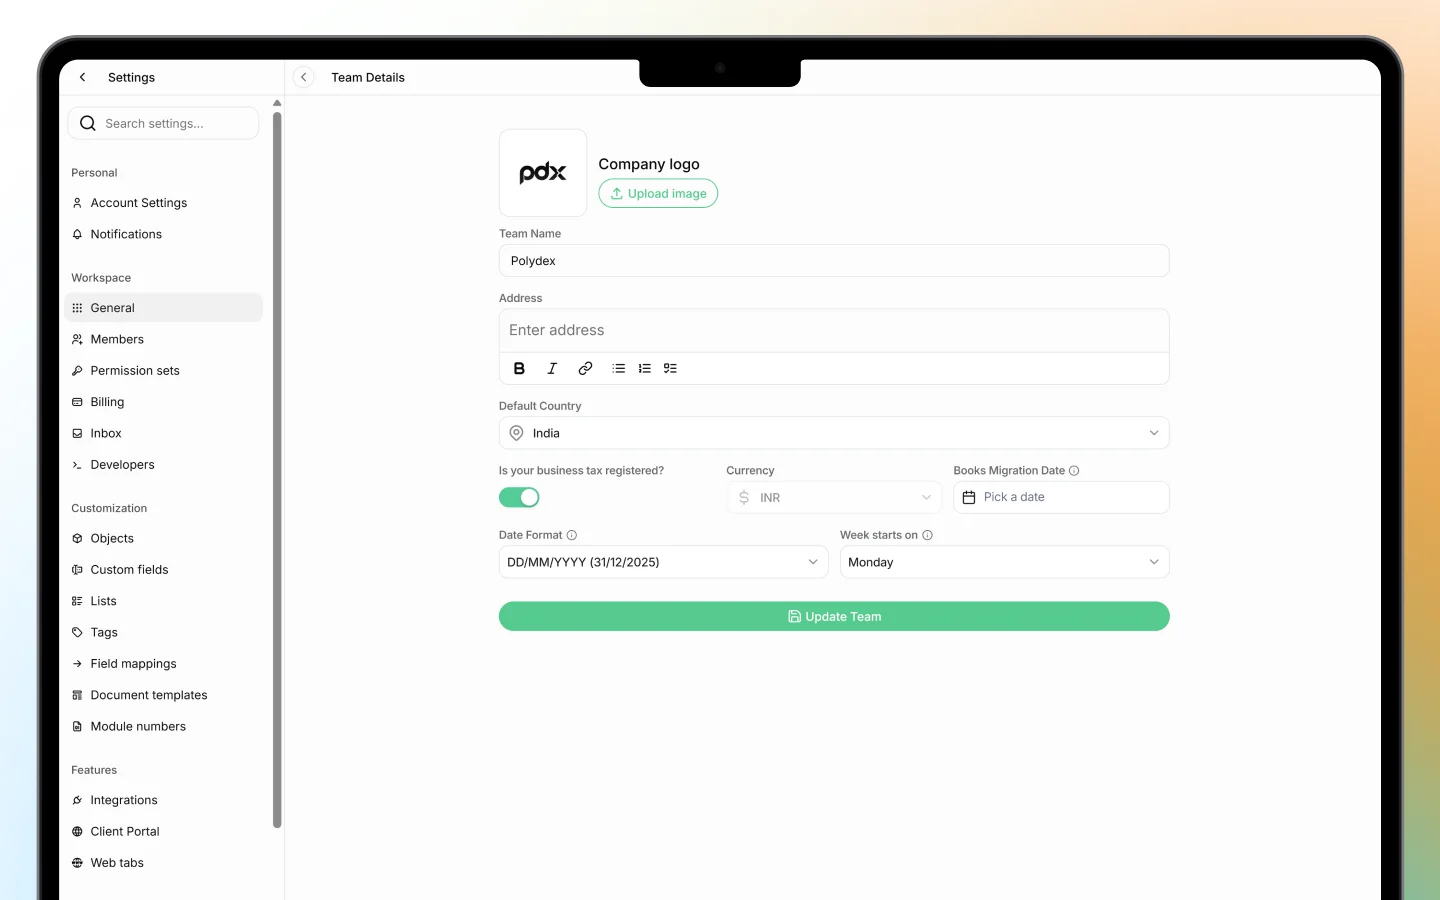 > These details appear automatically on all documents you send to clients, so make sure they are accurate before creating any quotes or invoices.
***
## 2. Set up your document templates
Go to **Settings > Templates** to configure the documents you send to clients.
* Select a quote template and set a default validity period
* Select an invoice template and configure payment terms
* Add your bank details or connect Stripe for online payments
* Set a default footer message or terms and conditions
> These details appear automatically on all documents you send to clients, so make sure they are accurate before creating any quotes or invoices.
***
## 2. Set up your document templates
Go to **Settings > Templates** to configure the documents you send to clients.
* Select a quote template and set a default validity period
* Select an invoice template and configure payment terms
* Add your bank details or connect Stripe for online payments
* Set a default footer message or terms and conditions
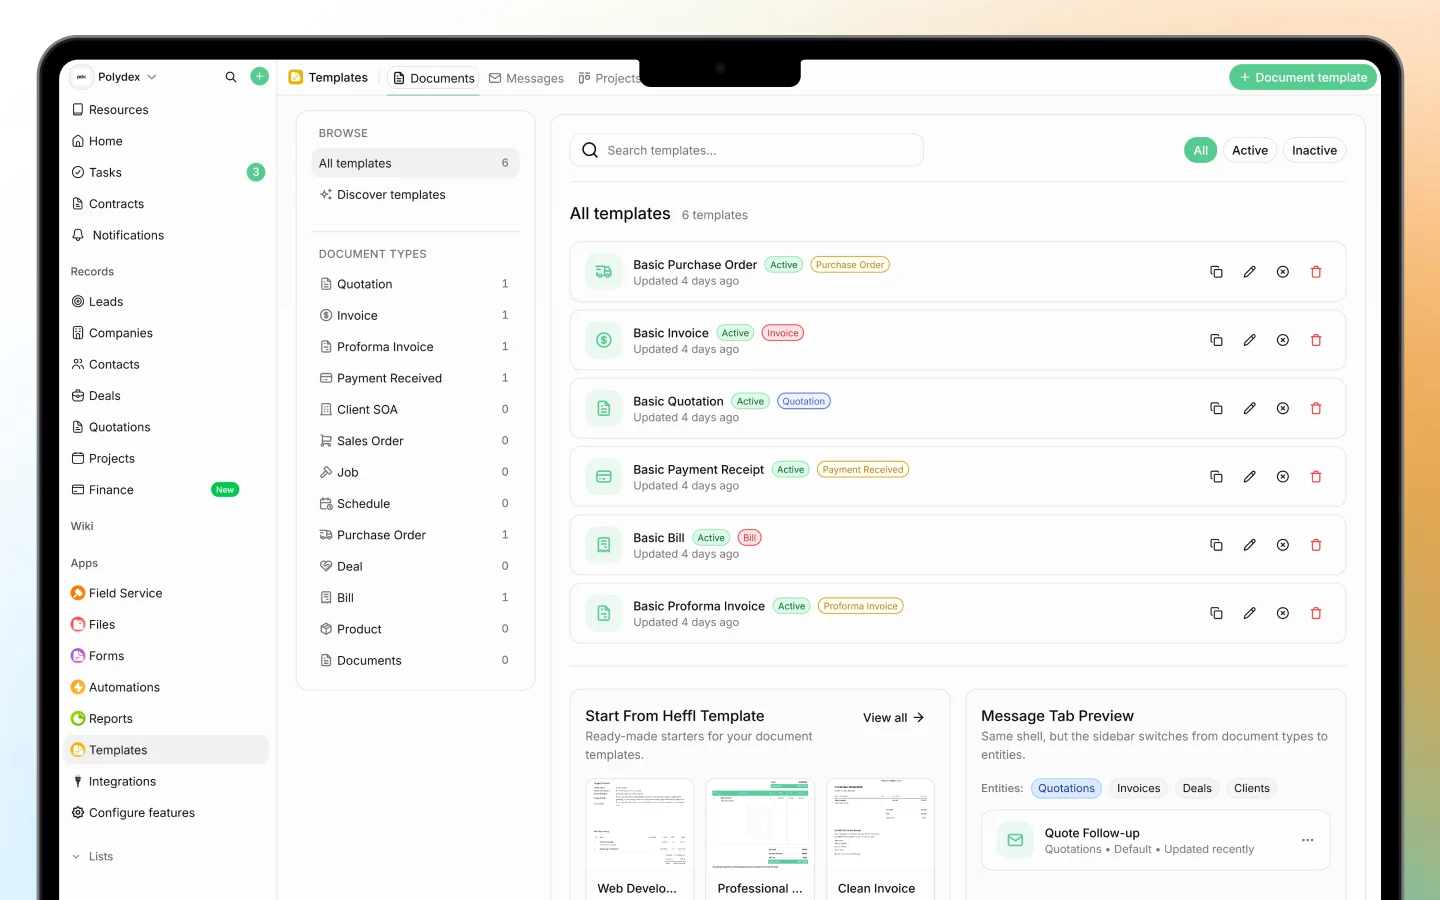 > These defaults apply to every new document you create, saving you time on repeat work.
***
## 3. Configure your integrations
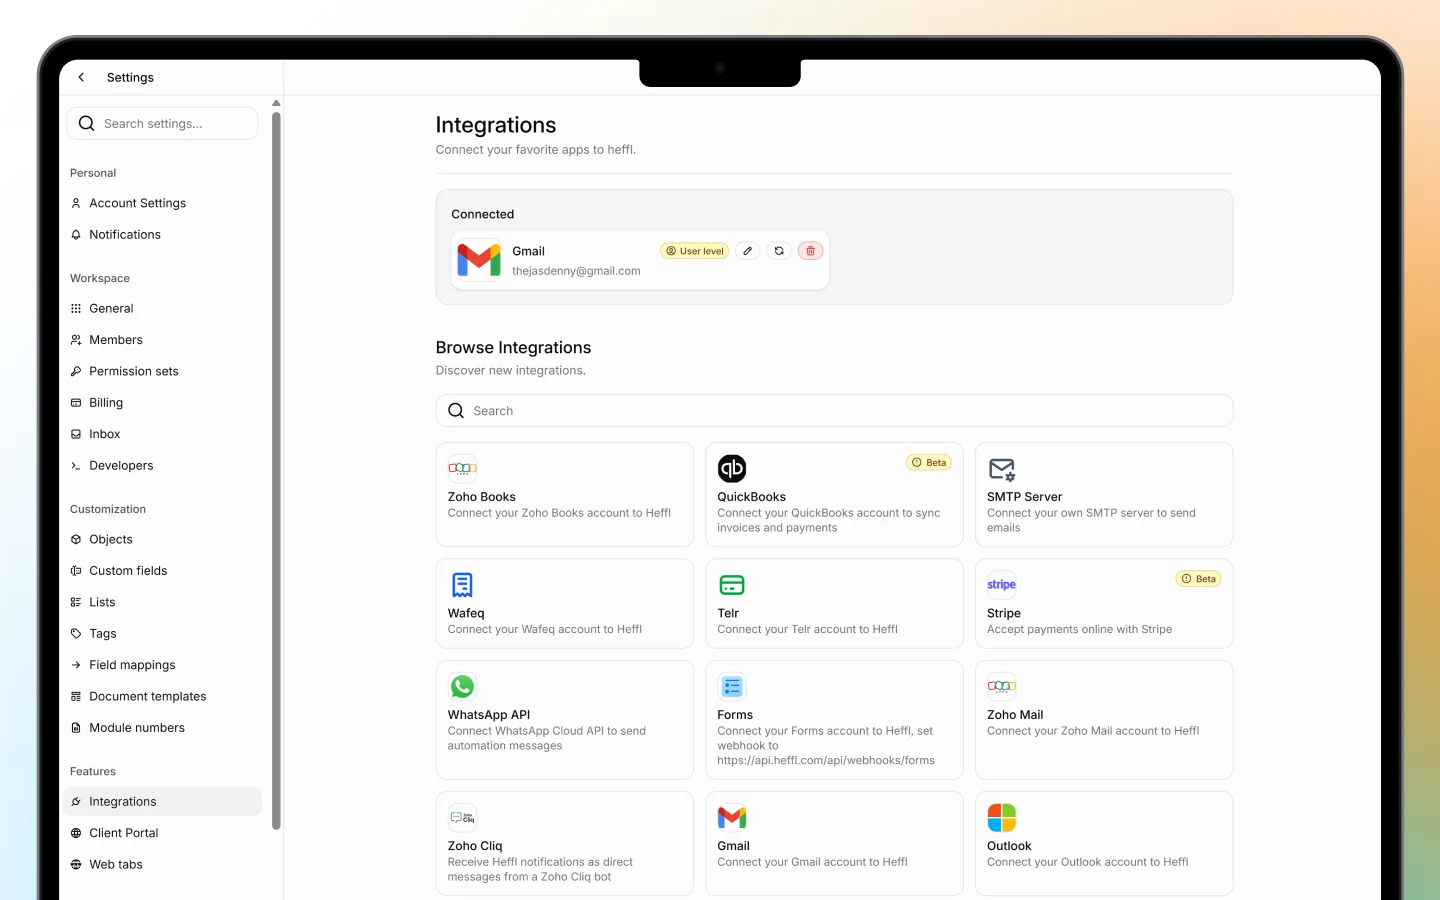
Go to **Settings > Integrations** to connect Heffl with the tools you already use.
* **Email** — connect Gmail, Outlook, or Zoho Mail to send documents directly from Heffl
* **Accounting** — sync invoices with QuickBooks or Zoho Books to avoid double entry
* **Calendar** — connect Calendly to sync meetings and follow-ups
* **Payments** — connect Stripe or Telr to accept online payments from clients
> These defaults apply to every new document you create, saving you time on repeat work.
***
## 3. Configure your integrations
Go to **Settings > Integrations** to connect Heffl with the tools you already use.
* **Email** — connect Gmail, Outlook, or Zoho Mail to send documents directly from Heffl
* **Accounting** — sync invoices with QuickBooks or Zoho Books to avoid double entry
* **Calendar** — connect Calendly to sync meetings and follow-ups
* **Payments** — connect Stripe or Telr to accept online payments from clients
 ***
## 4. Invite your team
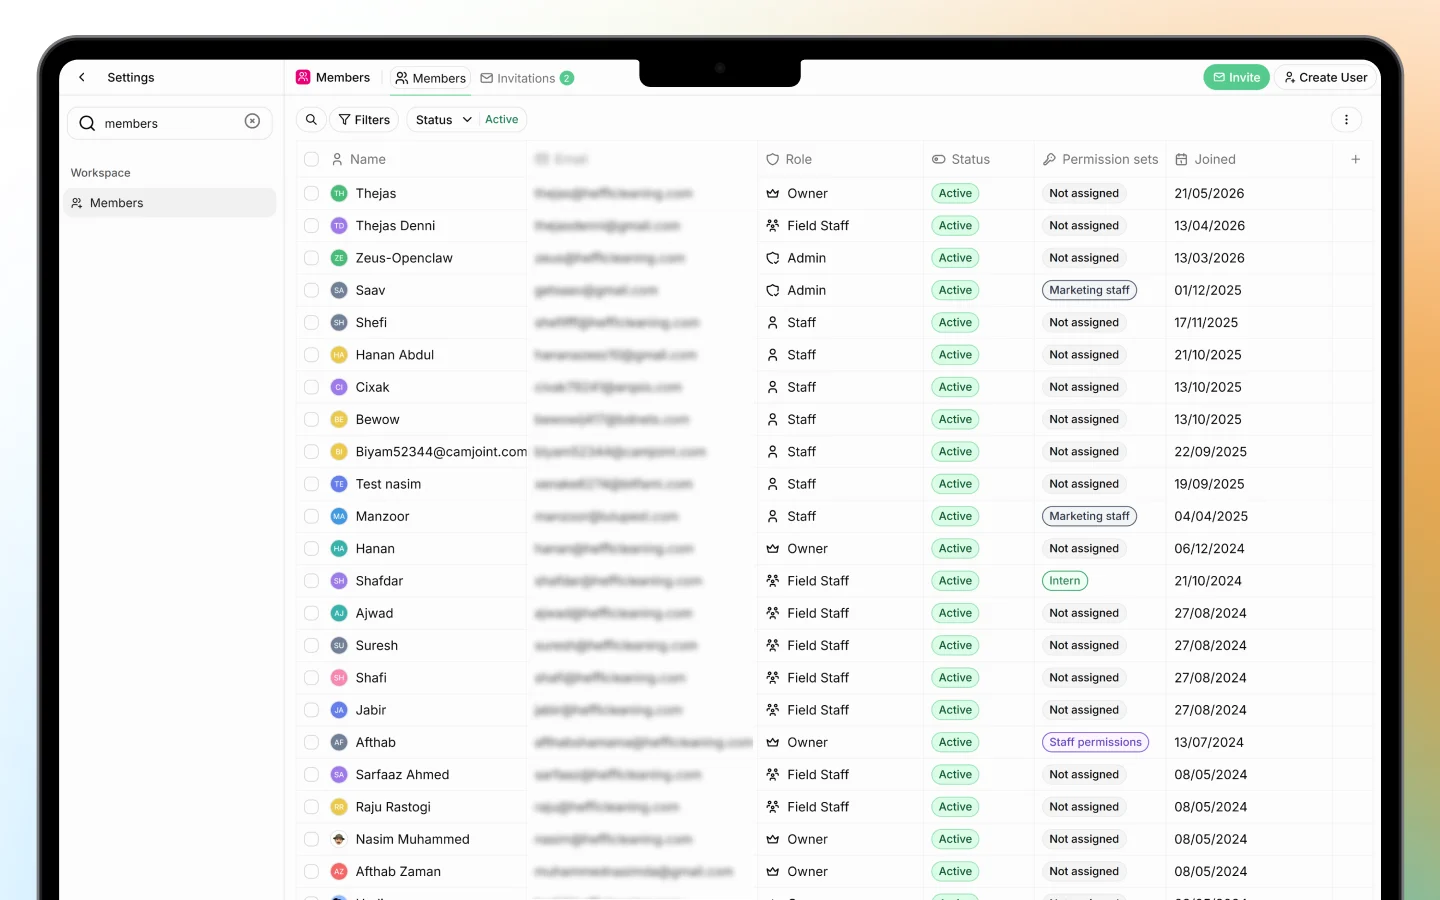
Go to **Settings > Members** and invite your team members.
1. Click "Invite member"
2. Enter their email address
3. Assign a role (Admin, Member, or custom)
4. Click "Send invite"
They will receive an email with a link to join your workspace. See [How to sign up and log in](https://docs.heffl.com/getting-started/how-to-sign-up-and-log-in) for what they will see on their end.
***
## 4. Invite your team
Go to **Settings > Members** and invite your team members.
1. Click "Invite member"
2. Enter their email address
3. Assign a role (Admin, Member, or custom)
4. Click "Send invite"
They will receive an email with a link to join your workspace. See [How to sign up and log in](https://docs.heffl.com/getting-started/how-to-sign-up-and-log-in) for what they will see on their end.
 ***
## What to do next
Once your workspace is set up, here is a suggested order to get started:
1. Add your first client in CRM
2. Create and send a quote from Sales
3. Convert the quote to an invoice once accepted
4. Schedule a job in Field Service or create a project in Projects
5. Invite your team and assign roles
See the [Modules overview](https://docs.heffl.com/getting-started/untitled-page) for a detailed guide on each module.
***
## What to do next
Once your workspace is set up, here is a suggested order to get started:
1. Add your first client in CRM
2. Create and send a quote from Sales
3. Convert the quote to an invoice once accepted
4. Schedule a job in Field Service or create a project in Projects
5. Invite your team and assign roles
See the [Modules overview](https://docs.heffl.com/getting-started/untitled-page) for a detailed guide on each module.