> ## Documentation Index
> Fetch the complete documentation index at: https://docs.heffl.com/llms.txt
> Use this file to discover all available pages before exploring further.
# Creating and sharing forms
Forms let you collect information from clients, leads, or your team through a shareable form, such as an intake form, a feedback survey, or an onboarding questionnaire. Responses are stored in Heffl where you can review them. You will find **Forms** in the sidebar.
 ***
## The Forms list
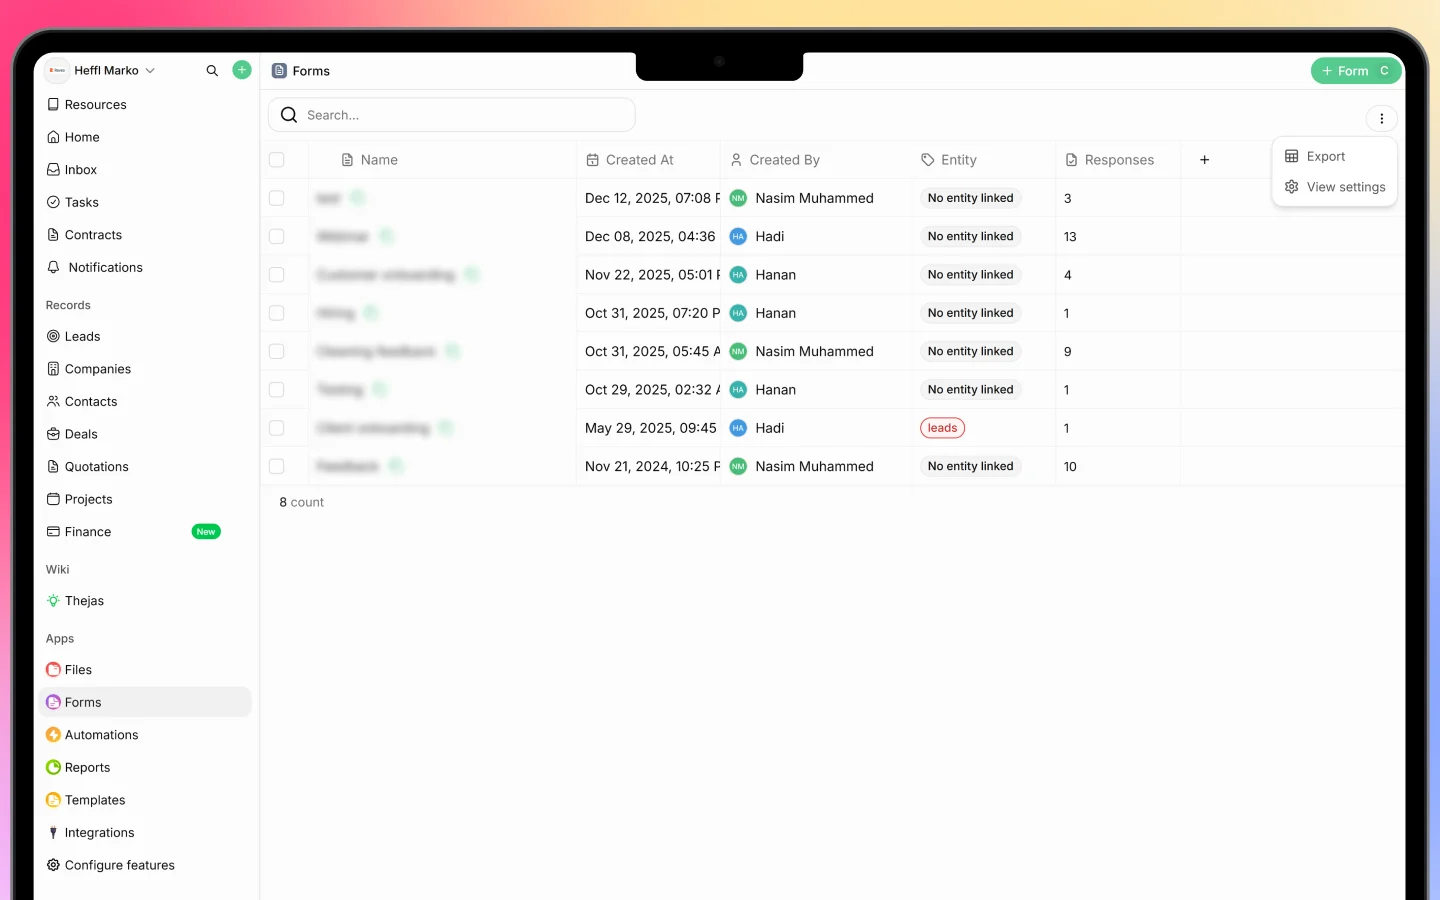
The Forms page lists every form with columns for:
* **Name**
* **Created At** and **Created By**
* **Entity**, the record type the form is associated with (such as "leads"), or "No entity linked"
* **Responses**, how many submissions it has received
Click a form to open it, or use **Search** to find one.
***
## Creating a form
Click **+ Form** to open **Create a new form**, then pick a starting point:
**Start from scratch** Build the form manually with full control over its pages and fields.
**Import with Heffl AI** Let AI draft the form for you. Choose one of:
* **Type or paste**, write a prompt or paste source text (for example, "Create a website intake form with contact info, brand goals, timeline, budget range, and required services")
* **Upload document**, drag in a `.txt` or `.docx` file and let Heffl AI turn it into a form
Then click **Generate draft with Heffl AI** to produce a draft you can refine.
**Use template** Reusable form templates (coming soon).
Tip: when prompting the AI, include phrases like "select one" or "select all that apply" so it builds the right option fields.
***
## Building the form
The form opens in the **Builder** tab, where you can:
* **Add fields** with **+ Field**, the questions and inputs your form collects
* **Add pages** with **+ Add**, to split a longer form into multiple steps
* Set a **Thank you / Ending page** shown after submission
* **Customize** the form's appearance
* Click any page or question to edit its settings
**Notify Users** Choose which team members are alerted when someone submits the form, so responses do not go unnoticed.
***
## Linking a form to an entity
A form can be associated with a record type (its **Entity**, such as leads), or left with no entity linked. This association organizes responses under that record type.
Note that linking a form to an entity does **not** automatically create a record when someone submits, it stores the response. If you want a submission to create a lead or another record, use an [automation](https://docs.heffl.com/introduction-to-automations) triggered by the form.
***
## Sharing a form
Once your form is ready, share it from the top-right actions:
* **Copy link**, share a public link people can open and fill in
* **Embed**, place the form directly on your website using the embed option
Anyone with the link, or anyone visiting the page where it is embedded, can submit the form without logging into Heffl.
***
## Viewing responses
Open the **Responses** tab to see submissions. Each response shows:
* **Created At**, when it was submitted
* A response **Number**
* **Linked To**, the record it is associated with, if any
The response count also appears on the Forms list, so you can see at a glance which forms are getting traction.
***
## What to do next
1. Share your form by [link or embed](https://heffl.com/) it on your site
2. Set up an [automation](https://docs.heffl.com/setting-up-your-first-automation) to act on submissions (for example, create a lead)
3. Review responses in the Responses tab
***
## The Forms list
The Forms page lists every form with columns for:
* **Name**
* **Created At** and **Created By**
* **Entity**, the record type the form is associated with (such as "leads"), or "No entity linked"
* **Responses**, how many submissions it has received
Click a form to open it, or use **Search** to find one.
***
## Creating a form
Click **+ Form** to open **Create a new form**, then pick a starting point:
**Start from scratch** Build the form manually with full control over its pages and fields.
**Import with Heffl AI** Let AI draft the form for you. Choose one of:
* **Type or paste**, write a prompt or paste source text (for example, "Create a website intake form with contact info, brand goals, timeline, budget range, and required services")
* **Upload document**, drag in a `.txt` or `.docx` file and let Heffl AI turn it into a form
Then click **Generate draft with Heffl AI** to produce a draft you can refine.
**Use template** Reusable form templates (coming soon).
Tip: when prompting the AI, include phrases like "select one" or "select all that apply" so it builds the right option fields.
***
## Building the form
The form opens in the **Builder** tab, where you can:
* **Add fields** with **+ Field**, the questions and inputs your form collects
* **Add pages** with **+ Add**, to split a longer form into multiple steps
* Set a **Thank you / Ending page** shown after submission
* **Customize** the form's appearance
* Click any page or question to edit its settings
**Notify Users** Choose which team members are alerted when someone submits the form, so responses do not go unnoticed.
***
## Linking a form to an entity
A form can be associated with a record type (its **Entity**, such as leads), or left with no entity linked. This association organizes responses under that record type.
Note that linking a form to an entity does **not** automatically create a record when someone submits, it stores the response. If you want a submission to create a lead or another record, use an [automation](https://docs.heffl.com/introduction-to-automations) triggered by the form.
***
## Sharing a form
Once your form is ready, share it from the top-right actions:
* **Copy link**, share a public link people can open and fill in
* **Embed**, place the form directly on your website using the embed option
Anyone with the link, or anyone visiting the page where it is embedded, can submit the form without logging into Heffl.
***
## Viewing responses
Open the **Responses** tab to see submissions. Each response shows:
* **Created At**, when it was submitted
* A response **Number**
* **Linked To**, the record it is associated with, if any
The response count also appears on the Forms list, so you can see at a glance which forms are getting traction.
***
## What to do next
1. Share your form by [link or embed](https://heffl.com/) it on your site
2. Set up an [automation](https://docs.heffl.com/setting-up-your-first-automation) to act on submissions (for example, create a lead)
3. Review responses in the Responses tab